Making the casts of the handles and legs do it yourself, how to avoid mistakes
How to make the volumetric casts of the handles and legs with their own hands. How to avoid the irregularities of the cast, cook and pour plaster, how to prepare a child. Registration of Slepkov
Currently, many parents make the castlers of children’s handles and legs with their own hands. Such a memorable impression looks very cute and will allow many years to remember the wonderful moments of early childhood.
Slots of children’s handles and legs with their own hands
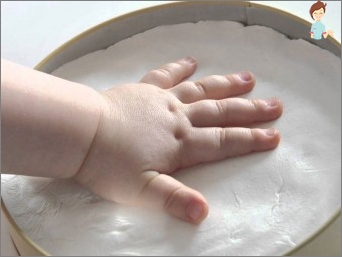 Step 1. Mix the powder for the mold with water. It turns out a paste that you need to shift into the container where the impression will be performed. In the mass you need to put a hand or leg. Pasta will start glare and take white color. Then, you must wait for approximately one minute so that the mass is fully hardened if the water is used in room temperature;
- Step 2. Move your hand or leg so that it slides out of the mold;
- Step 3. Mix the gypsum with water, note that there are no lumps. Pour the mixture into the form. Leave the imprint to the time so that the gypsum harvested;
- Step 4. Open or cut pieces of shape to free the cast;
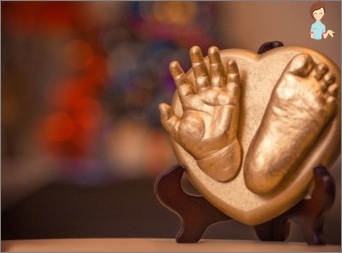
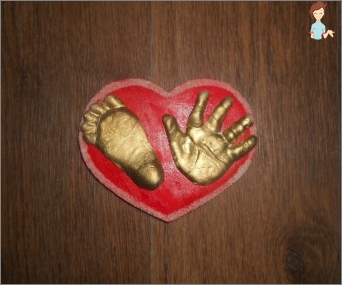
- Step 5. After drying, paint the cast in the selected color or cover the lacquer. If you purchased a set with a frame or stand, take it to the right place.
To make your hands to make the knobs, the legs do not need experience, you just need to read the instructions carefully. As a rule, sets contain all the necessary materials and tools. In addition, they often provide the opportunity to make several blinds, because work with the child is completely unpredictable, and whether the perfect contour will get – largely depends on our small models.
How to prepare for the performance of the volumetric cast of the handles and legs with their own hands:
- Take care of a good mood of a small model;
- You can use sleep time;
- The remains of the mixture after the manufacture can be difficult to wash off, so put on clothes that you do not feel sorry for;
- It is necessary to participate in two adults – one to take care of mixing ingredients, the second – to keep the baby and distract him;
- If you touched the walls or bottom of the form, you can pour the gypsum into it, and then, smooth out any flaws of sandpaper;
- The time for which the form will completely freeze, depends on the temperature of the water used – the colder the water, the longer it will be stuck than warmer water – the faster the material will be stuck, room temperature is optimal;
- Make sure the containers are suitable for the size of the leg or the hands of the baby.
How to prepare a child to make a cast of children’s handles and legs with their own hands
 Take advantage of the moment when small models are calm, it can be a moment of sleep or watching a cartoon. Some Sony can sleep all the most interesting and do not even notice what is happening around them.
Nevertheless, if the child is sensitive to cold, it is important to pre-moisten with the water or legs, so that the baby has the opportunity to get used to the mass temperature.
If it does not help, you can add warm water, but keep in mind that the higher the temperature, the faster the mass will stick.
In this case, you can add a little more water than indicated in the instructions or fall asleep all the contents of the bag.
If you want to make a casting form during the wakefulness of the child, it is necessary to find a moment when the baby is in a good mood, calm, full and slept. Prepare an attractive toy, book or other entertainment to distract the baby.
Do not worry that your baby slightly moving with his fingers, it will affect the final result, allowing you to exit air bubbles, while the mass can get into the gaps between the fingers. If the child moved his hand, try carefully to make the container by hand. Of course, you can gently hold the handle, but remember that you need to keep calm and keep the baby by force. Otherwise, the kid will receive unnecessary stress, and the quality of the impression will be reduced. The mass is frozen quickly, so it’s enough to wait a bit and everything will be ready.
Some children do not like when their leg or hand is immobilized, then you can add less water, which will speed up the moment of frozen. If the child reacts poorly at the time of immersing hands or feet into the ground, it is recommended to wait some time. For example, 2 weeks, and try again.
How to prepare molds to cast blinds for children with your own hands
To make an outtur with your own hands Mix the powder for shape with water in any container and pour into a closed plastic container, you can mix the mixture directly in the same container. Accurately measure the amount of ingredients, since the bad ratio may affect the final result. You can use a test sample that is sometimes attached to the set to have information about the process of frosting.
Carefully moisten the skin of children’s legs or hands so that they can be easily slipped out of the solidified form.
 Thanks to this manipulation, your child will be able to get used to the mass temperature, in addition, we will minimize the risk of air bubbles that worsen the quality of the product. Aim the kid handle so that it exactly and carefully slip into the prepared paste.
Do not worry if your child will smooth handle. The beginning of the hardening process will show the change in the color of the paste, and this is the moment in which the child should not perform very sharp movements. After hardening (about 1-1.5 minutes), take out the handle. To avoid holes in the hardened form, send a child’s hand without touching the bottom or walls of the container.
How to cook and pour plaster
Pouring plaster should not last longer than 5-6 minutes.
- Prepare a plastic bowl, measure the required amount of water and plaster in the appropriate proportions. Always add powder into water, and not vice versa;
- Purify the gypsum into the water slowly, with constant stirring, until the mass reach the consistency of a very liquid yogurt. Too intense and long mixing can lead to the fact that the mass begins to harden already during the fill in the press form. In addition, too strong mixing can lead to the formation of bubbles. If you see bubbles on the surface, say several times with a container so that they come out;
- Initially, the plaster is very watery, but after a while he gently begins to thicken. Gypsum is ready if it reaches a base dough consistency. Then, pour into the form a small amount of plaster and gently move the container in different directions so that the mass fills exactly each hole;
- After filling out the form on 1/3, knock down the table on the table surface;
- Pour the residue in batches;
- Leave the container for several hours to harden.
How to avoid air bubbles in plaster?
Air bubbles spoil the volumetric casts, as a result, the plaster does not reach the fingertips, and the impression will not respond completely to the child’s handle. This problem basically arises with the writing of the handles, as the fingers on them are longer than on the legs, and the gypsum does not always speak well into these holes.
You can use the following methods to avoid this:
 Stir the gypsum mixture is not too long;
- intensively and repeatedly knock the container with plaster on the table;
- Pulse large bubbles that appear on the surface;
- Initially, pour a small amount of gypsum and move it in different directions so that it is evenly growing across the form;
- Pour the mass through the walls, holding a container with a form at an angle – if the form is in a vertical position, and you pour from above, there is a risk that the mass will not fill the holes to the fingertips;
- In the case of legs, if you fill half the form, you can take a brush and distribute the mass with it;
- For the handles you should tilt the shape of your fingers down so that the mass is registered there.
In what position is most convenient to make the casts 3D
0-5 months. For the youngest children, it is necessary to carry out a procedure in a lying position, as for feeding.
5-12 months. Put baby to the parent sideways on one knee, legs should hang out free. Make «Airplane»: The parent holds the kid on his belly with his hands, sticks freely hang. In the sitting position: the parent seats the child on his knees, face to the table.
After solidification, carefully treat the product with sandpaper. After painting paint this processing will be invisible.
How to arrange the cast of the handles and legs with their own hands
The surfaces obtained can be issued in different ways:
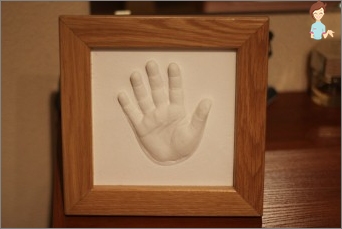
 in the form of a photo frame in which the cast is placed;
- In the form of a picture of a 3D cast from the handles and legs with their own hands, you can hang it on the wall or put on the shelf in the children’s room;
- in the form of statuettes.
You can add baby photos at the same age in the composition when the writing was made, and also come up with a background with the thematic plot – for example, a fingerprint legs on the seabed.
The resulting souvenir will delight you, and you can enjoy this memorable and beautiful thing for many years.

