Christmas toys do it yourself with step by step instructions!
How to make christmas toys for the new year yourself? New Year’s toys do it yourself with step-by-step instructions! Photo Instrument
Outside the window November-month and you can already begin to start preparing for the celebration of the New Year, think about New Year’s menu 2013 and that, how to decorate an apartment for the new year. Today we will offer you a few master classes how to make christmas toys do it yourself.
How to make a toy «Bowls paws» do it yourself?
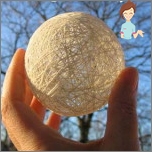
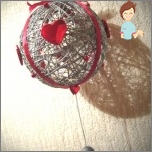
Bowls paws are very original and beautiful decorations that can be seen on many design christmas trees. They are not necessary to buy in stores for fabulous money, such an ornament can be very easily done at home.
To do this, you will need:
-
Threads (Iris, Moulin, for sewing, wool);
- Air ball of the desired size;
- Glue (stationery, silicate or PVA);
- Scissors and needles;
- Vaseline (fat cream or oil);
- A variety of decorations (beads, ribbons, feathers).
Step-by-step instructions for making ball cobwebs:
-
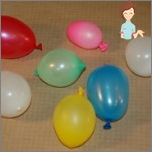
Take the ball and inflate it to the desired size. Tie it and on the tail Merring a thread of about 10 cm long, from it you will make a loop and hang drying.
- Then apply Vaseline on the surface of the ball, so it will be easier for you to disconnect from it.
-
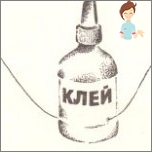
Heaven impregnate glue. This can be done in several ways. If you use multicolored threads, get very interesting interlacing.
- Pour the tube with glue with a hot needle so that you would get two holes, one opposite another. Through these holes, stretch the thread (it will be lubricated with glue, passing through the tube);
-
Take a comfortable tank and pour glue into it. Then soak for 10-15 minutes in her threads. Make sure that the threads are not confused;
- Wash dry thread on the ball. 4 step We skip and well soak the ball with glue with a sponge or tassel.
-
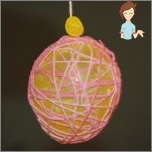
Impregnated with glue end thread fix on ball. To do this, you can use leucoplasty, protective tape, tape. Then wim up on the ball thread like a ball, every turnover in the other side. If you are used to a thick thread, then you need to do less revolutions, and if thin – turns need to do more. During work, carefully ensure that the threads were well moistened with glue.
- After you finish getting out, leave the loop thread again. Cut the thread and lead a drying ball. That the ball is good dry, it needs to be dried about two days. Ready Ball must be solid. Do not hang the product to dry over the heater, the material from which balloons make, it does not like.
-
When glue is good dry and hardened, you need to remove the air balloon from the web. This can be done in several ways:
- With a pencil with an eraser, leave the ball from the ball. Then neatly jolve the ball with a needle and cure a cape;
- Unleash the tail of the ball, whatever he blossom, and then cure him out of the cage.
-

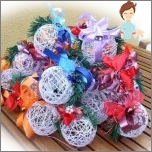
The resulting design can be decorated with beads, ribbons, beads, ribbons and other accessories. Also, it can be painted paint from the can.
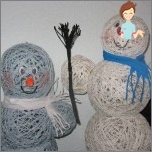
- All your ball is ready. By the way, if we glue a few such balls between themselves, it may be a pretty snowman.
How to make a toy «Good grandfather Moroza» do it yourself?
We all saw, which Chinese plastic Santa clauses are overflowing modern shops. However, looking at them, I absolutely can not believe that he can fulfill the cherished New Year’s desire. But the good fairy-tale grandfather frost can be done.
To do this, you will need:
-
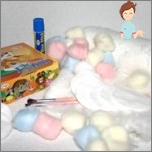
Wool (in the form of balls, disks and just in a roll);
- Paste. It can be done independently: in a small amount of water we divorce 1 st.L. Stachmala. Then we pour in boiling water (250ml) constantly stirring. Bring before boiling and give cool;
- Paints (watercolor, gouache, markers and pencils);
- Several brushes;
- Bubble from under spirits, oblong shape;
- Scissors, PVA glue, Plasticine and molding board.
Step-by-step instruction:
-
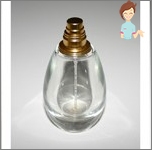
Take an empty bubble and remove the cover from it. Then glue it with cotton disks. For this, cotton discs are lowered into the hub, and then glue them to the bubble.
- The head of the future Santa Claus is sculpted from plasticine, wind it in Wat and dip in Kleister.
-
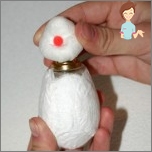
We give both items to dry well, and then connect them.
- Paints paint face Santa Claus.
- While the paints dry out, we glue the sleeves to the fur coile. Then on their lower edge cutting the mittens. Hat for Santa Claus Made from half a cotton ball, pre-dipped in Cleaster.
-

After the glue dries, paint the cap and the fur coat of our Santa Claus.
- Outdoor clothes make cotton flavors. We are very gently glued with toothpicks.
-
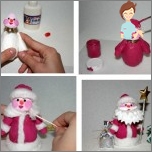
Then we glue the beard and mustache. Whatever the beard is volumetric, it must be done from several layers glued together. Each next should be a little shorter than the previous one. We offer you some options of beard patterns
-
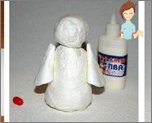
All your toy is ready. If you want to make a similar toy to hang on the Christmas tree, it should be easier. So the foundation for the fur coats and the head of Santa Claus should be done not from the bubble, but from the wool. To do this, roll it out in cone-shaped and round shape and sneak in the honesty. And then we do everything according to the instructions.
How to make a toy «Christmas balls» do it yourself?
For the manufacture of such magnificent balls you will need:
-
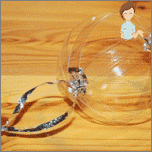
Plastic glue;
- Plastic bottle;
- Threads or rain;
- A variety of shiny decorative elements.
Instructions for the manufacture of Christmas balls:
-
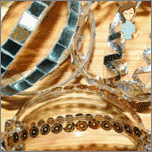
Apply a sheet of paper to a plastic bottle so that his edges were fed perfectly. The edge of the sheet to supply felt-tip pen. So we mark the contours of the rings, which would be easier to cut. Next, cut out 4 rings, the width of each about 1 cm.
- Rings with each other glue so,
As shown in the photo:
- Now you can start decoking our balls. They can be placed in a variety of sparkles, beads, foil, ribbons. It all depends on your desire and fantasy.
Making New Year’s toys do it yourself very interesting and exciting. In addition, children can be attracted to this lesson. We wish you all interesting ideas and creative success!
If you like our article and you have thoughts about this, share with us! It is very important for us to know your opinion!
