Children’s table do it yourself
children’s table do it yourself, make a children’s table, decoupage, folding, wooden, child, making, assembly, benefit, decoupage of the children’s table with their own hands, folding children’s table with their own hands, children’s wooden table do it yourself
Sometimes the space seems too close to equip it with cumbersome finished furniture. In this case, the best solution is to perform a wooden children’s table with your own hands.
Children’s table: simple option
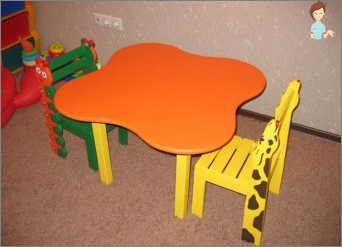 In order for the table to be as comfortable as possible and secure, it is recommended to order separate parts in a carpentry workshop, which has all the tools for high-quality wood processing.
The following materials will be required:
- Countertop 600×400 mm from glued timber or solid massif;
- 4 carcass bar;
- 4 legs with a cross section of 40×40 mm;
- Electrode with end mills;
- clamp;
- wood hacksaw;
- a hammer;
- joiner’s knife;
- sandpaper;
- carpentry glue;
- furniture varnish;
- furniture pins;
- ruler.
If the house has an old table, you can use its details for creating children’s furniture. In this case, the children’s table do it yourself – direct benefit. And if dad can handle carpentry tools, the piece of furniture will turn into a real work of art.
First of all, you need to decide on the height of the table. The most comfortable is the height in which the child with a straightened back, putting the elbow on the table top, is easily replete with your finger before the temple.
You can use special tables that recommend the height of tables and chairs for children of different ages.
Sequence of work to create a simple children’s table
- Depending on the necessary height, legs scolded. If the legs are narrowed to the bottom, it is better to dump them from below so that the table is extremely stable;
- Prepared legs are attached to the elements of the power frame using end mills. During the assembly, place space under the grooves and combine paired elements. Then, in the marked place, a hole is drilled, which should not work through;
- The depth of the opening is one of the thickness of the workpiece, and its diameter must correspond to the thickness of the future groove;
- The blanks of the legs alternately clamp in the clamp and choose the wood with the end mill as possible as much as possible until it turns out the smooth groove of the required size. There should be 8 grooves for 4 legs;
- The ruler measure the size of the groove and make the corresponding marks on the bars for the power frame;
- Using a joinery knife and hacksaw, the ends of the part of the power frame adjust, creating «spikes», which should be easily and firmly enter the grooves of the legs;
- To make a children’s table, it remains to conduct a control assembly of all elements. It is recommended to pre-measure the length of all parts and the corners between them. If necessary, the elements should be corrected. Otherwise, the table will be unstable and coastal;
- Collective table and checking it on stability, the design is again disassembled into separate details. Now the assembly is carried out, pre-slipping all the places of fixtures with special joinery glue;
- When the frame will dry, start the attachment of the table top. In the center of the legs drilled holes for installing a furniture pin. Placed on the reverse side of the stoves of spikes and drill the deaf holes;
- Managing the parts and adjusting the dimensions, the pins are wetted with carpentry and combine the design into a single integer;
- The finished wooden table is carefully squeaked with small sandpaper and covered with several layers of varnish.
No less simple in the design made by your own hands folding children’s table, the table top which is attached to the wall.
Comfortable folding table for a child
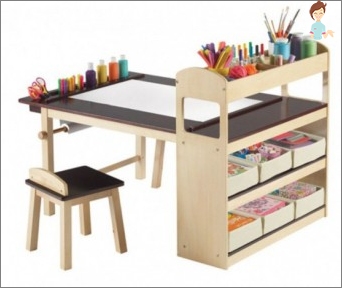 Complete to create an original interior item the following tools and materials:
- 4 doubles 6×2 cm long 72 cm;
- 4 doubles 6×2 cm 32 cm long;
- Countertop of 2 parts;
- electric drill;
- carpentry glue;
- sandpaper;
- furniture pins;
- Dowel.
Sequence of work to create a folding children’s table
The manufacture of such a model does not take much time, but will save space in a small apartment:
- From the board you need to perform 2 frames that will play the role of folding legs;
- Using stencil, drill holes for fastening in the end parts of the boards. The lower frame of the frames should be raised above the floor by 5 cm. Details are connected to pins;
- In the holes poured jelly glue and connect the parts into the frame. It is advisable to maximize the design, trying to make the frames at the same time do not bother;
- Between the frames fasten with loops;
- In the wall is drilled, pre-measuring the level, holes under the dowel. Countertop consists of two parts. The width of the first, fixed part is up to 30 cm. The second part connects to the first with the help of loops;
- The first part is fixed to the wall. Under it, it is attached to the wall with a dowel vertical, folding frame. It is necessary to accurately output all the sizes to achieve the perfect connection of the frame and countertops;
- The second part of the table tops are fixed with loops to the first and lay out over the frame-support;
- At any time you can lift the second part of the table top and fold the frames. After that, the mobile part of the countertop is lowered, and the table takes the minimum of space.
And so that the object of the furniture looks beautifully, you can make a decoupage of the children’s table.
How to decorate a table
Just make it easy to make it, it is also important to decorate a new product. And here can use the decoupage technique.
And to perform the simplest decoupage, you will need the following materials:
- Pictures (a child can choose the image itself);
- acrylic paints;
- primer;
- glue;
- brush.
By the way – you can decorate this way absolutely any furniture.
Sequence of work when applying an image on a decoupage technique
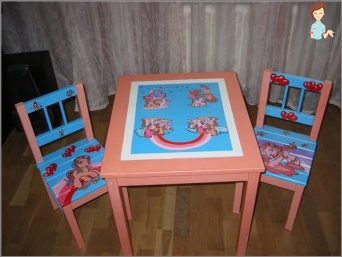 The countertop is coated with primer and cleaned with sandpaper after complete drying;
- Then the surface is stained in the selected shade;
- Pictures from magazines or special drawings are applied to a pre-careful surface. If a decoupage card is used – the image is soaked in water for a couple of seconds;
- When the pictures are dried, the countertop is covered with varnish.
The child is a full member of the family who needs a personal space. This space should be multifunctional and include all the necessary furniture items, including a table needed for games, drawing, performing lessons, modeling and t.D.
Create comfort and comfort for your crumbs with your own hands! Successful to you crafts and thankful smiles from your baby!

