Knit original bucks
Bakatus – the original accessory that diversifies and decorate almost any image. It can be bought already in the finished form or to tie it yourself, that is not so difficult, as it seems
Baktus – a triangular shape scarf that is suitable for different outfits. Many compare it with a conventional shell. It is important to notice that such an accessory is suitable for both women and men. Not necessarily buy it in the store, as there are many different options to make it with your own hands.
What is important, the process of its creation is quite easy and anyone can cope with him.
As knitting knitting bucks?
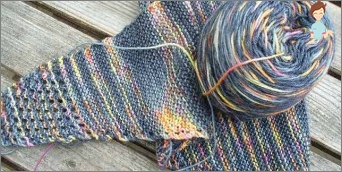 You can choose for yourself completely any color or even several different options, which will get the original option. On average, for one product will require 200 g of yarn. You can use cotton, wool and acrylic.
Threads for this accessory can be taken completely different, but consider that the thickness of the thread will depend on the thickness of the thread. Starting stands with 4 loops. Knit facial loops and, reaching the 5th row, make an additive. After checking the 2nd loops, hook the thread, which is located in the previous row between the loop under №2 and 3.
Throw this thread through the needle and check another loop. In the end it will be 5 loops. Using this knitting scheme with knitting needles, continue to work until the desired length. Do not forget in each 4th row to add on the loop.
If you want the scarf to be thinner, then it is worth adding loops through 6 rows. Make sure that the surplus loops be solely on the one hand. As for the center of the product, it can be sharp or rounded. If you choose your first option, then after adding loops through 4 rows, make a burn.
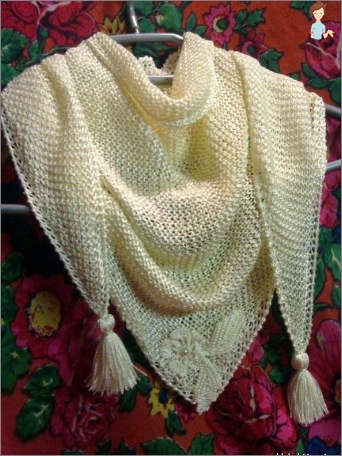 In the second version for rounding the center, check 10 central rows without adding. To reduce it costs in each 4th row to lies together the 2nd and 3rd loop. Deliver according to the scheme discussed for an increase. When 4 loops should be closed. That’s all, the scarf is ready.
You can link eggs with a toothed edge, but in this case, namely, for the processing of the edge, it is worth using a hook. The handkerchief made by the above scheme can be tied with beautiful cloves. To do this, dial 7 air loops on the front side and 1 connecting column to the second loop from the hook. Then 1 column without a nakid to the next air loop.
In the next loop 1 semi-slim with Nakad, then another column with Nakud. The next step is 1 Stoblik with 2 naughty. Another air loop – a column with three nakidami. To make a buckle with a gear edge, it remains to add 1 connecting column up to the next in the column scarf with three nakidami.
How to tie a buckle wave?
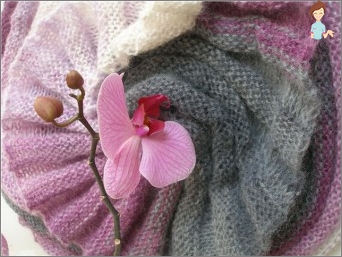
Such a scarf version looks very elegant. Knit it is easy, the main thing is to figure out the scheme. It is recommended to use the spokes of 3 mm.
VOLASTERS NEED Knit starting from the corner. Type 3 loops first and check 6 rows by a conventional facial viscous. In the last associated along, add 1 air loop, but only from the inside.
After that, tie the same number of rows, but invalid. At the end again, add the air loop. Similar scheme, prick the scarf of the desired length, but not less than 40 cm. Tied eggs with knitting needles, do not forget about the hinge add. To give a sharp roundness, it is necessary to add on every 2nd row of the inside on the loop, and at the beginning of each 6th row from the outside, close one.
 Consider that the second part should be at least 30 cm. When the desired length will be done, measure the upper edge. In general, the length should not be less than 70 cm.
To enhance the curvature, adhering to the scheme, at the beginning of each 6th row you need to close 4 loops, but at the same time it is worth adding to each row. As a result, small corners will turn out.
It remains only to be tied to the desired length and close all loops. Unusual accessory ready. This original product can be associated or present to someone as a gift, as we are sure that it will certainly like everyone.
How to tie a crochet openwork egg?
Similar accessory can be knit or crocheted. Whatever the option is not selected, the product knit is easy and very fast. In general, the triangular jam can be big or small.
There are many different options, we will look at the openwork accommodation in size 166×7 cm. Start standing with a magic ring. Then make 3 air loops (VP), which are used to lift. After that you need to tie 2 columns with Nakud (CH). Turn everything and in the second row Make 3 VP to lift and 1 sn in the same base loop.
Next step – 2 CH. Turn over the product and in the third row, check 3 VP and 4 CH. At the same time, 2 latter needs to be performed in one loop. Go to 4 row to start with 3 VP. Make 1 CH in the same base loop. After that, check 4 sn.
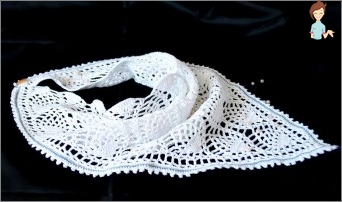 We continue to knit eggs with a crochet in the fifth row. To do this, type 3 VP and knit, alternating VP-CH. From the 6th to the 9th row, you need to repeat the same thing that was done from the 1st to the 4th. Do not forget to do CH to make an increase. To knit openwork 10th row alternate VP with CH.
When the desired width will be achieved, you can start to subscribe a loop to get a triangle as a result. After everything is ready, it remains to arrange the edge. To get original, you can use other color threads.
Place the edge using columns without Nakid and VP. First, take 2 columns without Nakid and after 3 VP. Still left to make 9 columns without Nakid and 3 VP. In this original edge decorate all the product. As a result, you will get a beautiful scarf.
As you see, knit eggs are quite simple and if you understand the schemes, then the product can be done in the day. Experimenting with threads and patterns you can get a beautiful and original accessory.

