Decoupage Boxes from under shoes
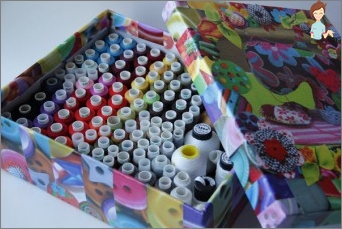
Decoupage of the cardboard box will help get the original accessory, not at all similar to the finished boxes and boxes. It is possible that this kind of needlework will be a favorite hobby
Optional to buy pretty storage containers. You can and independently turn an absolutely unnecessary thing in the elegant box, using the decoupage technique.
How to transform the box out of shoes
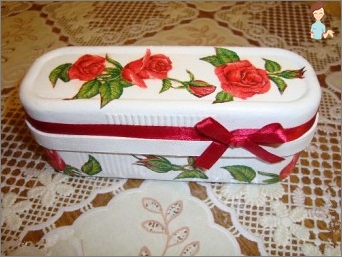 Simple shoe box can be transformed into a work of art, attaching some skill and fantasy.
The following materials will be required for work:
- cardboard box;
- PVA glue;
- brush;
- colored paper;
- scissors;
- wax paper.
For novice needlewomen advise to take a box of smooth rectangular shape. After performing only a few original accessories, you can proceed to the development of more complex techniques, making decoupage boxes from under shoes, decorated with protrusions. While working is used sufficiently thick paper, optionally color. Perfectly suitable for design packaging paper with various prints or pattern.
The sequence of work is as follows:
- The rectangle of the desired size is cut out of a thick sheet of paper and with the help of PVC adhesive glue to the lid. The dimensions of the rectangle can be arbitrary;
- From the paper of contrasting colors, smooth strips are cut and the box cover around the perimeter is glued. Strips can enter the other side or connect at an angle of 45 ° C. If you use curly scissors, the decoupage of the cardboard box at beginners will look especially interesting;
- Boca is planted with stripes, trying not to leave spaces. It is advisable to use a wider cutting so that the edge of the paper can be turned into. In the same way, the lower part of the box and its inner space are treated;
- It remains to decorate the rectangles of paper placed on the lid with the outer, as well as the inside. You can perform a flat applique, cutting out of the colored paper of funny animals. It is possible to design a surface with paper or tissue flowers, a pattern of rhinestones, to create an artistic painting;
- Very beautiful is a decoupage of a cardboard box, if you use corrugated napkins. However, this is a very gentle material that is easy to break when sticking. Therefore, in the absence of due experience, it is recommended to shock with napkins only part of the cardboard.
Cardboard and paper – fragile materials that over time are easily abrained and polluted. So decoupage boxes should be fixed. In most cases, the surface of the improvised accessory is covered with varnish or plow glue. However, these compositions also have shortcomings. Varnish can give yellowness by muffling saturated colors, and PVA glue is also short-lived.
When using the glue surface, you need to process at least 3 layers, having waiting every time when the glue is completely dry. You can purchase special adhesive for decoupage, which is guaranteed not to spoil the color range and long will keep the appearance of the product.
Sticking paper, you should not use a large amount of glue, as the paper will twist and deform. Having mastered the master class using paper, you can go to a more complex stage and try to place a box with multi-colored fabrics.
Decoupage wooden box
After decoupage cardboard Paper boxes and napkins, you can use the resulting skills in the design of a wooden drawer. This product, often plays the role of a box intended for storing wine or original packaging for a valuable gift.
To perform a decoupage of a wooden box for wine, materials will be needed:
- acrylic soil;
- acrylic lacquer;
- sandpaper;
- glue for decoupage;
- acrylic paints;
- liquid wax plaid;
- Napkin with a suitable image;
- stencil;
- Toothbrush;
- sponge.
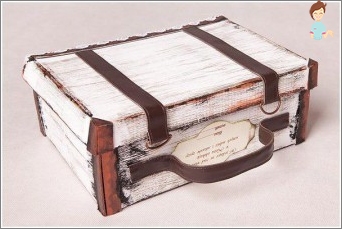 If there is any fittings on a wooden product, it must be previously removed. I must say, the master class of decoupage of the cardboard box is much easier than the design of a wooden drawer. It will be necessary to show patience to get a good result.
Work in the following sequence:
- The wooden surface is carefully opened with sandpaper;
- The prepared surface is covered with acrylic soil using a foam sponge or brush. After completely drying the primer, it is cleaned with a fine-grained emery, thoroughly aligning the layer;
- The napkin with the selected pattern or independently, the drawing is glued to the top of the cover with glue for decoupage. The rest of the surface is painted with acrylic paints. When the paint dries, again neatly squeeze the surface;
- The Liquid Wax of Plaid is applied to the foam sponge and toned the surface, focusing the ends. Using wax will help slightly «wear out» Accessory, giving him a pronounced aristocraticity. Dried wax is also recommended to handle sandpaper;
- Using harvested stencils, drawings or inscriptions are applied to the wooden box. At the final stage, the accessory is covered with splashes of paint with a toothbrush and screw the necessary accessories.
Now it remains to cover the surface 2-3 layers of acrylic varnish. The inner part of the drawer is better to handle the verse.
How to arrange a plastic container
Having bought, for example, ice cream in a plastic container, should not be thrown out capacity. You can perform a decoupage of a plastic box, having received a beautiful packaging for coffee beans, welding, jewelry or candies.
Decoupage technique In this case, only such materials will be required for work:
- Transparent glue «Moment»;
- coffee beans;
- acrylic paints;
- napkins;
- PVA glue;
- varnish.
 Before starting work, plastic container must be rinsed, degrease its surface and dry and act according to the following plan:
- The surface of the tank is stuffed with plow glue. The side parts after drying the glue are painted with acrylic paints;
- The surface of the lid is glued part of the napkin with a suitable pattern. The remaining space of the lid and the bezel is painted in contrastful colors;
- Coffee beans stick over a rim of the box, subscribing their edges for better clutch. Capacity covered with varnish.
Using general recommendations, each wizard can choose the technique that he my own. Adding a little imagination, anyone willing will turn a simple box to a refined accessory, complementing the design of the apartment.

