Is it possible to put rubber boots: practical recommendations
Your rubber boots proceed, but you feel sorry to throw them out? Our article is exactly what you need. In it you will find a few simple ways, how to return the second life to your boots!
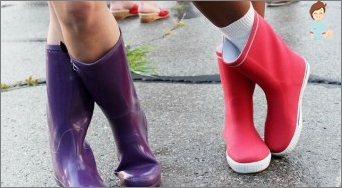
For a long time they ended those times when rubber boots used only for hiking in the forest or mountain. Today, even in the most prestigious shoe stores, you can find a huge amount of diverse rubber boots. Here and boots on the sole and on the height. There are also hiking options. And so, if you have become the happy owner of these beautiful boots, no puddles and rains are not afraid you.
 But, given that there are far from the ideal order on the streets today, you can easily stand on a broken glass, a nail or ordinary stationery button. And pierce rubber is quite easy!
So now, because of the little hole throw away almost new rubber boots?
Not at all! And today we will teach you how to correctly stick your favorite boots and extend their lives for a long time.
Glue or not glue – that’s what is the question ..
«Why glue yourself, if you can attribute their shoes», you ask. But unfortunately, in most cases you will refuse. The only thing that can advise you in this case shoes is to visit the auto repair shop on which tire vulcanization is carried out.
But here we are waiting for a catch with you: Recently, almost all motorists moved to modern wheels, where vulcanization is not needed. And this means that finding a car service with such an option, where else to agree to put your boots quite problematic. So let’s think how to make our boots alone.
And before we start studying ways of sticking boots from rubber, it is worth noting that it is used in this case. Ordinary plow glue or «Moment» It is not necessary, because at best you will not achieve any effect, and at worst – boots will be hopelessly spoiled!
Where to find special glue for adhesive rubber boots
If you decide to glue rubber shoes yourself, you can search for a special adhesive composition in stores with fishing gear. Attention! Boots can be made not only of rubber, but also from EV (ethylenevinyl acetate) or polyurethane. And glue for these materials will be different.
So before going to the store carefully read your boots. And if you have problems with the definition of the material, it is better to take shoes with you, and in the store specialists will quickly determine what it is made from.
Special means for adhesive boots can be bought in stores for motorists. In this case, you should pay attention to glue-sealant. So you will not only get rid of the samples, but also be able to protect the place of application of glue from improving fluid.
How to glue rubber boots: well-known ways and small tricks
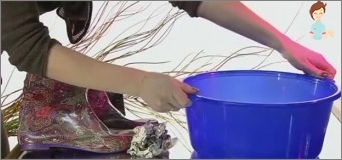
 In order for your shoes to become like a new one you need to determine the exact place of the puncture. To do this, you will need boots and a small basin with water. We take your shoes and turn the top to the same principle that the tube with toothpaste, when it is almost left there.
And when the top of the top is quite tightly, we lower the sole into the water. From those places where there is a crack or puncture will pop up air bubbles.
After the problem site is found, you can start restoring your shoes.
There are several methods:
- Fisherman’s method. To do this, you will need glue from the fishing store, which we told a little earlier. With the procedure itself, you need to follow the instructions that are described on the package. In most cases, it is the same: you need to first sand a problem space, then degrease the surface and glue a pre-prepared rubber gasket. If you are the owner of the EVA boot, then this procedure will take even less time, because in this case you do not need to use any patch. Just bend the edge of the boot with a bunch and pour some glue there. Then he strongly squeeze the edges and hold them in this position for a few minutes;
- Cyclist method. In this case, you will need a special Remcoplekt, which has anyone who deals with this sport. From this kit you will need a latch on a special protective film, sandpaper and glue. The cropping process is as follows: the break place carefully treat sandpaper. Attention! The size of the processed area should be slightly larger than the hole itself. Then degrease this place with acetone. From the patchwork you need to remove the protective film and apply a small amount of glue to the open surface. I need to smear glue and puncture. A few minutes later, when the glue becomes slightly more viscous, we strongly press the latch to the boot. The only disadvantage of this method is not a particularly aesthetic appearance, so you can repair only country boots;
- Method motorist. This method, unlike the previous one, is ideal for both country shoes, and for elegant women’s boots. For such repair you need adhesive sealant. It must be applied fine, but solid layer in the place of puncture. Attention! In no case should not produce similar repair with dirty shoes. Before you decide to take up the repair work boots should be thoroughly washed and dried, because the particles of dirt or water droplets will have a negative impact on the result, and you will have to redo it again.
Using such fairly simple methods, you can quickly and effectively return your boots into operation, and they will serve you for quite a long time.
A few words about leaving rubber boots
Well, as a completion, we offer you several recommendations regarding the care, the use of which will help you keep your boots in working condition much longer. For example, so that your boots as long as possible looked like new, you should periodically wipe them with a soft cloth moistened in water with the addition of glycerin.
 And if you had to be like a puddle and you want to dry such shoes on the battery, then we are in a hurry to tell you what to do it is not recommended. The fact is that under the influence of hot air glue, which gloves some elements can become porous.
And this means that water will fall inside the boot. So it’s better to just wipe boots with a rag and leave to dry natural.
So today we have figured out how you can take rubber boots with your own hands at home. As you can see, your shoes can still be given a new life! The main thing is to do everything clearly following the instructions, and your rubber boots will long be happy to delight you in rainy days!


